
Upcycled Owl Tote Tutorial - Part 2
We left off with a finished front design and all the pieces cut out - now it's time to put them together!
(To see Part 1, click here)
Step 4: Create base
Cut out the stabilizer 1/2" smaller than your base measurements all the way around. Place this between the two layers of fabric for the base. Sew around the edge of the base. (You can sew once down the middle to secure the stabilizer)

Step 5: Attach the front and back of the bag to the base. I used french seams, but this is optional. Also optional - matching the plaid (ain't nobody got time for that!)

Be sure to press your seams!

Step 6: Attach the sides to the base. Your tote should now look something like this:

Step 7: Sew up the sides
The first one I did a french seam, but realized it would cause excess bulk for the next step, so I did the other three as normal seams.

Press all seams, then turn your bag right side out.
The next step is an optional finishing for the edges of the sides of the bag. I guess you could call it a backwards, or inside out french seam. Sew along the outside of each edge, about 1/4" from the seam. This will give the edges a nice crisp finish and help the bag hold its shape.
Before and After:


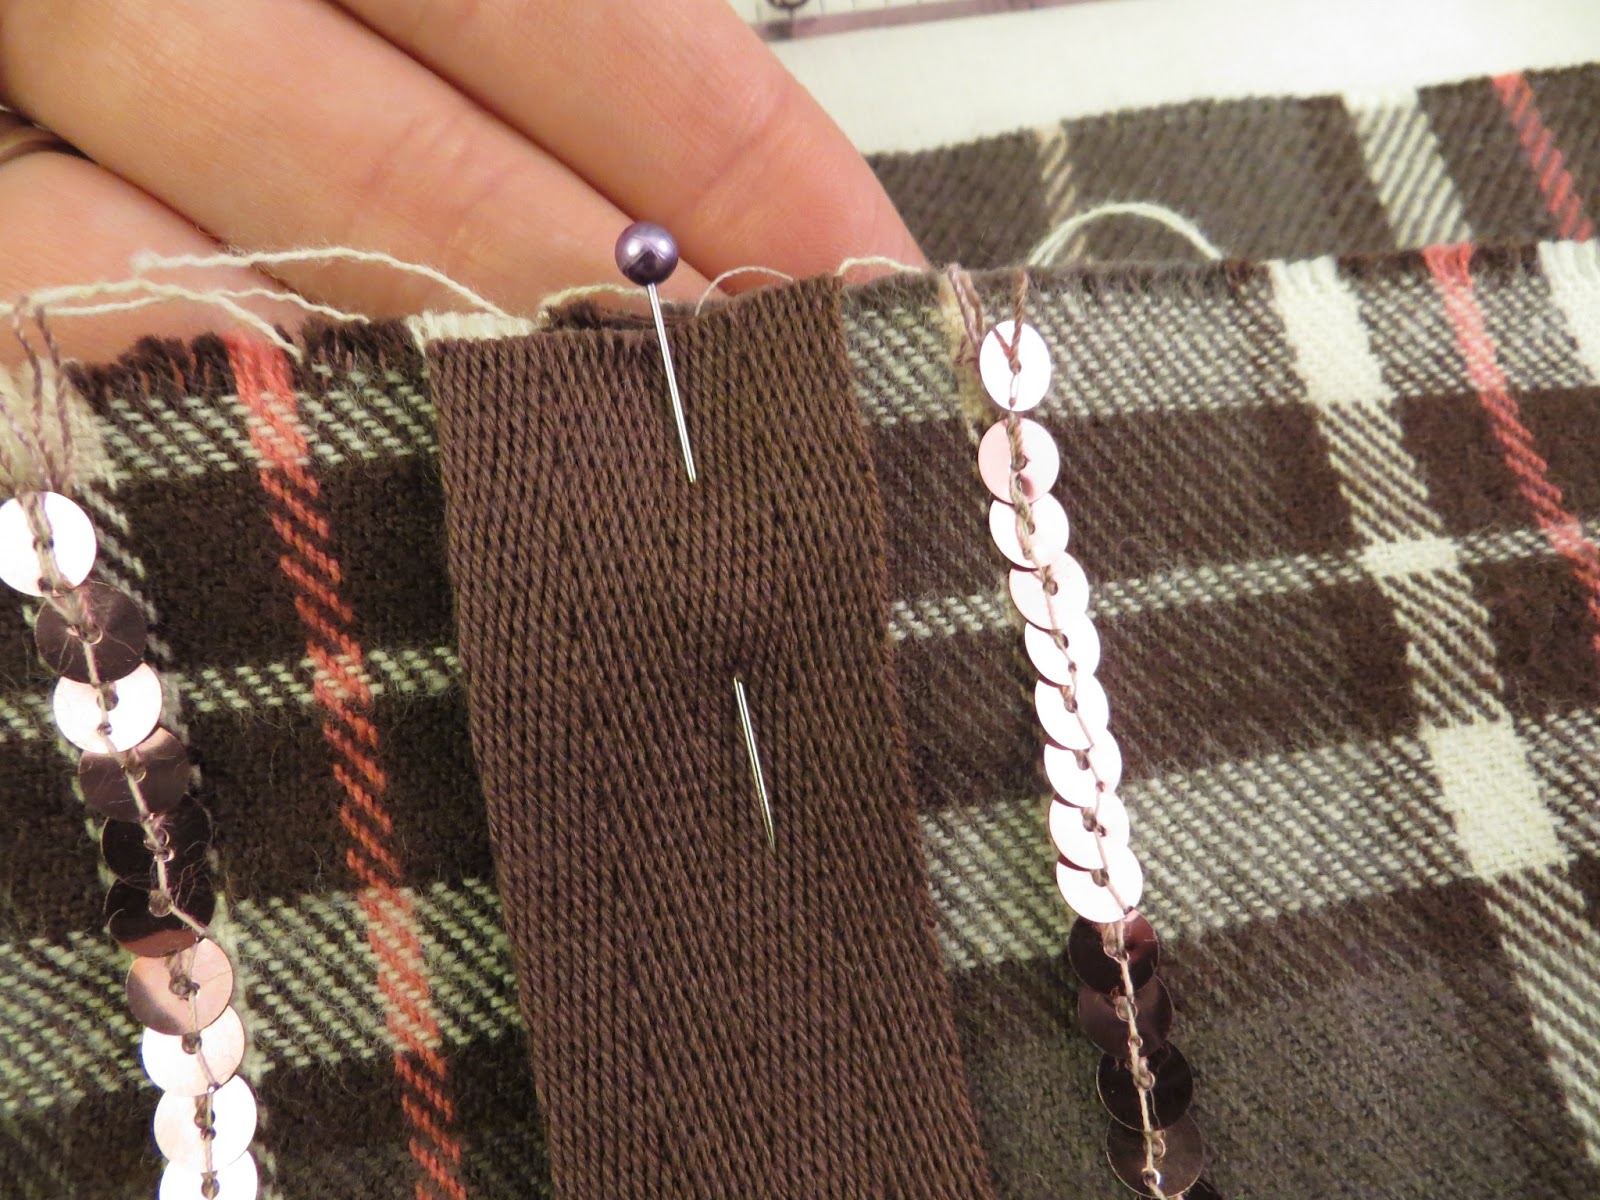
For this tote, I used 1" twill tape ribbon in brown. You could use any kind of heavy-duty ribbon, purchase pre-made handles (brown leather would be cute!), or make them out of the leftover fabric. Cut two handles, each approximately 24" long (this measurement can really vary, as long as you cut them both the same length - one of my biggest pet peeves is when a bag gets caught on your elbow as you try to swing it on your shoulder because the handles are too short. I pinned the handles at different lengths until I found just the right one!)

Pin one end of the handle so that it's edge lines up with the edge of the front of the bag, about 5" from the side seam. Place the other end the same distance from the other side.


Sew back and forth 1/4" from the edge across each handle end. Repeat with the handle on the back.

Now you are going to fold the entire front top edge over TWICE.
The first fold should be 1/4", so the stitching matches up with folded edge. Press fold.


That owl is just too cute! My little sis better be glad I'm not keeping it for myself :) There are endless other possibilities for a simple tote like this! (some of which I might just try)
- You could add a top closure with snaps, buttons, a ribbon tie, or anything else.
- Make a matching wristlet or pencil case with any leftover material
- If your fabric is more floppy like mine was, you could add stabilizer to the front and back panels as well as the base
Do you have other ideas for this project? Also, any feedback on my first tutorial would be great! Thanks for reading :)
(To see Part 1, click here)
Step 4: Create base
Cut out the stabilizer 1/2" smaller than your base measurements all the way around. Place this between the two layers of fabric for the base. Sew around the edge of the base. (You can sew once down the middle to secure the stabilizer)

Step 5: Attach the front and back of the bag to the base. I used french seams, but this is optional. Also optional - matching the plaid (ain't nobody got time for that!)

Be sure to press your seams!

Step 6: Attach the sides to the base. Your tote should now look something like this:

Step 7: Sew up the sides
The first one I did a french seam, but realized it would cause excess bulk for the next step, so I did the other three as normal seams.

Press all seams, then turn your bag right side out.
Step 8: Finish the corners
The next step is an optional finishing for the edges of the sides of the bag. I guess you could call it a backwards, or inside out french seam. Sew along the outside of each edge, about 1/4" from the seam. This will give the edges a nice crisp finish and help the bag hold its shape.
Before and After:


Step 9: Attach handles
For this tote, I used 1" twill tape ribbon in brown. You could use any kind of heavy-duty ribbon, purchase pre-made handles (brown leather would be cute!), or make them out of the leftover fabric. Cut two handles, each approximately 24" long (this measurement can really vary, as long as you cut them both the same length - one of my biggest pet peeves is when a bag gets caught on your elbow as you try to swing it on your shoulder because the handles are too short. I pinned the handles at different lengths until I found just the right one!)


Now you are going to fold the entire front top edge over TWICE.
The first fold should be 1/4", so the stitching matches up with folded edge. Press fold.

The second fold should be approximately 1/2" and encase all the raw edges. Press again, then pin.


Finally, finish the top edge with a straight stitch, a zig zag, or whatever you think would look best :) Finish the back, then the two sides the same way.
Aaaaaaannnnnd..... TA - DA!!! We're done! (aside from trimming all the little threads everywhere :)


- You could add a top closure with snaps, buttons, a ribbon tie, or anything else.
- Make a matching wristlet or pencil case with any leftover material
- If your fabric is more floppy like mine was, you could add stabilizer to the front and back panels as well as the base
Do you have other ideas for this project? Also, any feedback on my first tutorial would be great! Thanks for reading :)


4 Comments
I am loving this! Great tutorial!!
ReplyDeleteThanks Jamie! I wish I had more owls to make more bags! :)
DeleteOh my gosh Sally, this is super cute! I'm thinking I might have to have you teach me a thing or two if and/or when I move to Chicago :)
ReplyDeleteUmmm yes and yes! When you DO move here we can hang out and have sewing parties :) YAY!
Delete